Saturday, May 30, 2009

Strawberry-Banana Ice Cream

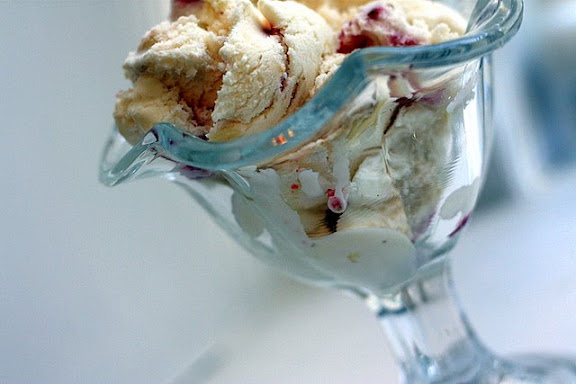
In my world, anything with fruit in it is automatically healthy. So I can totally assuage the ice cream guilt when I dish out a hefty bowl of this Strawberry-Banana Ice Cream (found on Crazy in Minnesota and originally from Sweet and Savory Eats).

I usually turn up my nose and any ice cream that doesn't contain chocolate, but this was really good (especially if you add chocolate syrup!). A perfect, fresh, "summery" ice cream!


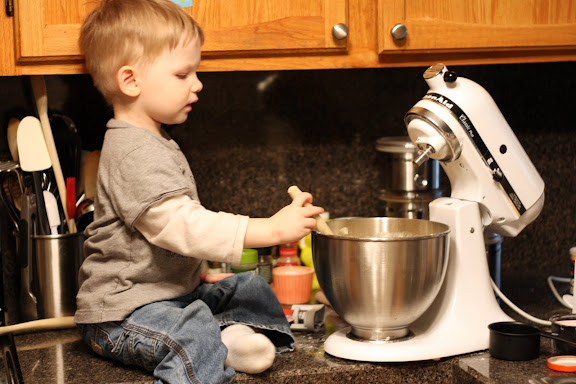
When I was photographing this, Ryan wanted to "help." He took the shot below. Not too shabby for a two-and-a-half-year-old!


Ingredients
  • 2 cups fresh ripe strawberries, stemmed and sliced (I used about a cup and a half, plus two sliced bananas)
  • 3 tablespoons freshly squeezed lemon juice
  • 1 cup sugar, divided
  • 1 cup whole milk
  • 2 cups heavy cream
  • 1 teaspoon pure vanilla extract
Combine the strawberries with the lemon juice and 1/3 cup of the sugar; stir gently and allow the strawberries to macerate in the juices for 2 hours.

In another bowl, use a hand mixer to combine the milk and granulated sugar until the sugar is dissolved. Stir in the heavy cream, the vanilla and any accumulated juices from the strawberries.

Turn on your ice cream maker and pour the mixture into the frozen bowl. Let mix until thickened, about 25-30 minutes.

Add the sliced strawberries during the last 5 minutes of freezing.

Friday, May 29, 2009

Corn, Tomato, and Avocado Salad

We had our families over to grill last weekend, and I was looking for a yummy side to go with everything else. I headed over to Colleen's blog, intending to get the recipe for the Tri-Colore Orzo she made when we got together a couple of weeks ago, but instead found this Corn, Tomato, and Avocado dish.

It was super quick to prepare, looked awesome on the table, and was delicious. I did think that the lime was a bit too overpowering for my taste, so next time I would just use slightly less. But there for sure WILL be a next time!

Ingredients
  • 10 ounces frozen corn, thawed completely
  • 1 pint cherry or grape tomatoes, halved
  • 2 scallions, thinly sliced
  • 1 avocado, diced
  • 2 tablespoons lime juice
  • 1 tablespoon good quality olive oil
  • kosher salt and coarse ground black pepper, to taste

Combine corn, tomatoes, scallions in large bowl. Whisk together lime juice, olive oil, salt, and pepper and pour over vegetables. Chill for 1-4 hours.

When ready to serve, add gently fold in avocado and allow salad to come to room temperature. Season again with salt and pepper if needed.

Thursday, May 28, 2009

Happy Birthday to Me! Chocolate Overdose Cake

In just 365 days, I will hit the big 3-0... sigh...

I usually take my birthday off from cooking, but as soon as I saw this amazing Chocolate Overdose Cake on Annie's blog, I knew that's what I wanted for my birthday. So I spent the morning in the kitchen on the day we had our families over to celebrate the day I entered this world!


In the interest of time, I did take one major shortcut - I used a brownie mix instead of making the brownie layer by hand (I am still posting Annie's original recipe in case anyone else wants to do the whole shebang). But I did everything else, and I'm pretty freaken proud of myself! This was definitely the most involved dessert I've made, and it was absolutely delicious.


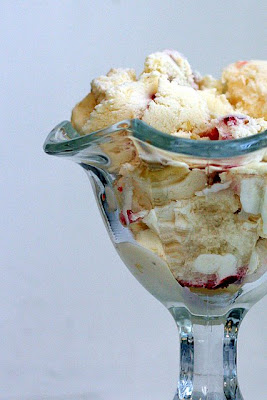
My cake obviously does not look as pretty as Annie's, but it sure tasted great. And pay no attention to the ugly photo below. I almost didn't even post it, but I did want to show the layers in the cake.


Ingredients
For the brownie base:
  • 1/2 cup plus 2 tbsp. cake flour
  • 1/4 tsp. salt
  • 1/2 tsp. baking powder
  • 3 oz. unsweetened chocolate, chopped fine
  • 6 tbsp. unsalted butter, cut into 6 pieces
  • 1 1/8 cups sugar
  • 2 large eggs
  • 2 tsp. vanilla extract

For the chocolate mousse filling:

  • 6 oz. semi-sweet chocolate, broken into 1/2-oz. pieces
  • 1 7/8 cups heavy cream
  • 1 tbsp. sugar

For the chocolate cake:

  • 2 oz. unsweetened chocolate, coarsely chopped
  • 1/8 cup Dutch-processed cocoa
  • 1/4 cup hot water
  • 7/8 cup sugar, divided
  • 7/8 cups unbleached all-purpose flour
  • 3/4 tsp. baking soda
  • 1/2 tsp. salt
  • 1/2 cup buttermilk
  • 1 tsp. vanilla extract
  • 2 large eggs
  • 1 large egg yolk
  • 6 tbsp. unsalted butter, soft

For the ganache:

  • 1 1/2 cups heavy cream
  • 2 tbsp. unsalted butter
  • 18 oz. semisweet chocolate, broken into 1/2-oz. pieces

Directions:
To make the brownie base, line the bottom of a 9-inch springform pan with a round of parchment paper and spray the sides with nonstick cooking spray. Center a rack in the oven and preheat to 325 degrees F. In a medium bowl, combine the cake flour, salt and baking powder. Stir with a fork to mix. Melt the chocolate and butter in a large heatproof bowl set over a saucepan of almost-simmering water, stirring occasionally, until smooth.

When the chocolate mixture is completely smooth, remove the bowl from the saucepan and gradually whisk in the sugar. Add the eggs one at a time, whisking after each addition until thoroughly combined. Whisk in vanilla. Add in the flour mixture in two additions, folding with a rubber spatula until completely homogenous.

Transfer the batter to the prepared pan and smooth with a spatula. Set aside, prepare the cake batter, and bake the two layers at the same time.

To make the cake, line the bottom of a 9-inch round cake pan with a round of parchment paper. Grease and flour the sides of the pan. Combine the chocolate, cocoa and hot water in a medium heatproof bowl; set the bowl over a saucepan containing 1-inch of simmering water and stir with a rubber spatula until chocolate is melted, about 2 minutes. (Note: at this point, my mixture was pretty thick and I thought I had ruined it, but mixing in the sugar was like magic and it made it smooth and liquidy again.) Add 1/4 cup of sugar to the chocolate mixture and stir until thick and glossy, 1 to 2 minutes. Remove bowl from heat and set aside to cool.

Whisk flour, baking soda and salt in a medium bowl; set aside. Combine buttermilk and vanilla in a small bowl.

In the bowl of a stand mixer fitted with the whisk attachment, whisk the eggs and yolks on medium-low speed until combined, about 10 seconds. Add remaining sugar, increase speed to high, and whisk until fluffy and lightened in color, 2 to 3 minutes. Replace whisk with paddle attachment.

Add the cooled chocolate mixture to the egg/sugar mixture and mix on medium speed until thoroughly incorporated, 30-45 seconds, pausing to scrape down sides of bowl with rubber spatula as needed. Add softened butter one tablespoon at a time, mixing about 10 seconds after each addition. Add about one third of the flour mixture followed by half of the buttermilk mixture, mixing until incorporated after each addition (about 15 seconds). Repeat using half of remaining flour mixture and all of remaining buttermilk mixture (batter may appear separated). Scrape down the sides of the bowl and add remaining flour mixture; mix at medium-low speed until batter is thoroughly combined, about 15 seconds. Remove bowl from mixer and fold batter once or twice with rubber spatula to incorporate any remaining flour. Pour into prepared pan; smooth batter to edges of pan with an offset spatula.

Bake the brownie and cake layers at the same time: the brownie for 25-30 minutes and the cake for 30 minutes, or until a toothpick inserted in the center of each comes out clean. Transfer the pans to a wire cooling rack. Allow the brownie to cool completely in the pan. Allow the cake to cool in the pan for 15 minutes, then invert onto the wire rack and allow to cool completely.

Once the brownie layer has cooled, run a knife around the edges to separate it from the pan. Remove the sides of the springform but leave the brownie layer on the springform base. Form a ring of parchment paper around the brownie layer and extending up the sides of the springform pan – reclose the springform so that the parchment is fitted tightly to the sides.

To make the chocolate mousse filling, place a stand mixer bowl and whisk attachment in the freezer or fridge. Heat 1-inch of water in the bottom half of a double boiler over medium heat. Place the semisweet chocolate in the top half of the double boiler. Tightly cover the top with plastic wrap and allow to heat for 8-10 minutes. Remove from the heat and stir until smooth. Transfer the melted chocolate to a stainless steel bowl and set aside until needed.

Place heavy cream and sugar in the well-chilled bowl of an electric mixer fitted with the chilled whisk attachment. Whisk on high speed until stiff peaks form, about 1 1/2 minutes. Remove the bowl from the mixer. By hand, whisk to combine 1/4 of the whipped cream into the melted chocolate until smooth and completely incorporated. Add the combined whipped cream and chocolate to the remaining whipped cream and use a rubber spatula to fold together.

Spread the mousse over the top of the brownie base evenly. Use an offset spatula to smooth the top. Place the cooled cake round over the mousse, pressing down lightly. Chill for at least 1 hour.

To make the ganache, heat the heavy cream and the butter in a saucepan over medium high heat. Bring to a boil. Place the semisweet chocolate in a 3-quart stainless steel bowl. Pour the boiling cream over the chocolate and allow to stand for 5 minutes. Stir until smooth. Chill 1 cup of ganache for 1 hour. Allow the remaining ganache to come to room temperature (about 40 minutes).

Remove the springform ring and parchment collar from the assembled cake. Carefully transfer the cake to a serving platter, removing the springform base and parchment round. Use a spatula to smooth the room temperature ganache over the cake top and sides, covering evenly.

Place the chilled ganache in a pastry bag fitted with a shell tip and pipe a shell border around the base of the cake. Pipe 12-16 rosettes around the top of the cake to indicate servings. Serve chilled and store leftovers in the fridge. Cut the cake with a hot, dry knife.
Wednesday, May 27, 2009

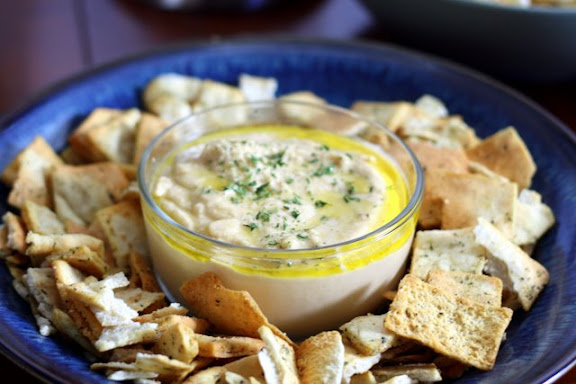
Hummus

First of all, I can't say "hummus" without thinking, "Hummus! I got the Hummus!" I love Friends.

I first spotted Katie's hummus recipe on Colleen's blog and thought it would be a perfect little appetizer for our Memorial Day Weekend barbecue. I followed the recipe to the letter (well, sort of - the can of chickpeas I had was 15oz, not 12. Also, my garlic cloves were kind of little so I used 4) and was really impressed with how easy this was to throw together.

As is usual for a hostess, I didn't get to each much of this (just a little finger dip when it was fresh out of the food processor!) but it was quite a hit. It was definitely very garlicky, but that was quite alright with the crowd we had.


Ingredients
  • 1 12-oz can chick peas
  • 1-2 large cloves garlic
  • 2 Tbsp extra virgin olive oil
  • 2 tsp+ tahini (sesame paste)
  • juice of 1 lemon
  • 1/4 tsp salt

Directions:
Drain water from the can of chick peas into a small bowl and reserve.

In a food processor (or blender), mix together the chick peas with the remaining rest of the ingredients, being careful to add second half of lemon juice and tahini slowly, stopping to taste.

Slowly add some of the reserved liquid from beans and a bit of water for correct consistency,(about 1-2 minutes) until a smooth, slightly fluid paste is formed.

Refrigerate for at least 30 mins before serving. This changes the taste of the hummus by allowing the flavors to form.

Note: to dress the hummus up for the table, the traditional way of serving is on a plate, with an extra drizzle of olive oil on top and a sprinkle of paprika and chopped parsley.

Tuesday, May 26, 2009

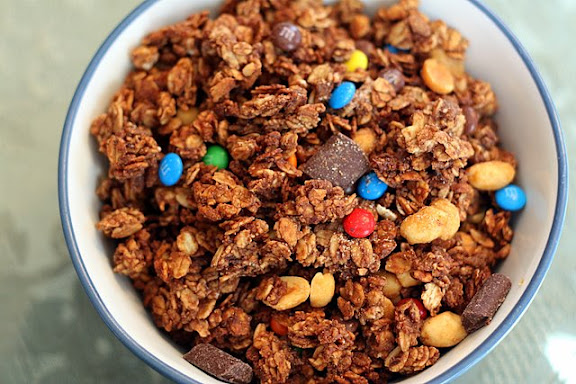
Banana Peanut Butter Granola

I have made this granola (courtesy of Annie's Eats) a few times, but this is the first time that it has lasted long enough for me to photograph it!

I used to eat a yogurt for breakfast every morning. Then, early on in my pregnancy with Ryan, I had such an aversion to it. I don't know if it was the texture or what, but it would make me gag. Long after Ryan was here, I still couldn't bring myself to eat yogurt.

About 3 weeks ago, I grabbed one of Ryan's yogurts when I made the first batch of this granola. I took this breakfast to work, and it was unreal. I'm not only psyched to eat yogurt again, but doubly thrilled to have found this delicious accompaniment.

I love that it's so versatile; each time I make it, I throw different things in there. This time, as you can see, I added some mini-M&Ms, which made my vanilla yogurt full of colorful swirls!


Ingredients
  • 3 1/2 cups rolled oats
  • 2 1/2 cups puffed rice cereal (I don't know if this is the same as Rice Krispies, but that's what I've used!)
  • 2 tbsp. honey
  • 1/3 cup applesauce (I have used a single-serving cup of cinnamon applesauce - yum!)
  • 1/3 cup mashed bananas
  • 1/3-1/2 cup creamy peanut butter, warmed slightly (I have been using Dark Chocolate Peanut Butter)
  • 3/4 tsp. salt
  • 1/4 tsp. cinnamon
  • 1/3 cup brown sugar
  • 1-1 1/2 cups dried banana chips (I've omitted)
  • 1/2 cup honey roasted peanuts
  • 3-4 oz. bittersweet chocolate, coarsely chopped (optional)

Preheat the oven to 325 degrees F. Line a baking sheet with parchment paper.

In a large bowl, combine the rolled oats and puffed rice cereal. In a medium bowl, whisk together the honey, applesauce, mashed banana, peanut butter, salt, cinnamon and brown sugar until smooth. Pour the wet ingredients into the dry ingredients and stir with a rubber spatula until the oat mixture is evenly coated. Spread onto the prepared baking sheet in a thick even layer.

Bake for 30 minutes. Then, using a large spatula, turn the granola over in segments. Bake for an additional 15 minutes. Depending on the size of your baking sheet, the center may not be fully dried. If necessary, remove the edges of cooked granola and bake the remaining granola for 10-15 minutes more or until done, being careful not to over-bake. Cool on a wire rack.

Once the granola has cooled, crumble it into a large bowl or plastic bag. Add in the dried banana chips, honey roasted peanuts and bittersweet chocolate, if using. Mix well to combine. Store in an airtight container.

Thursday, May 21, 2009

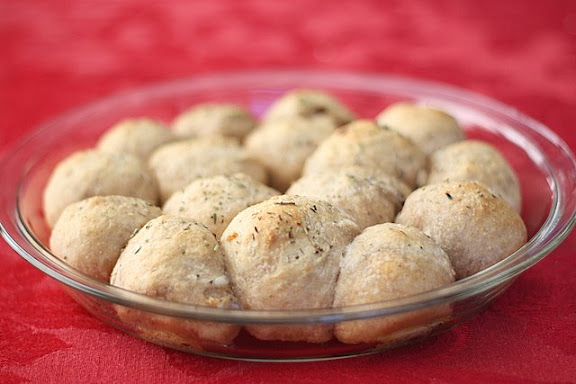
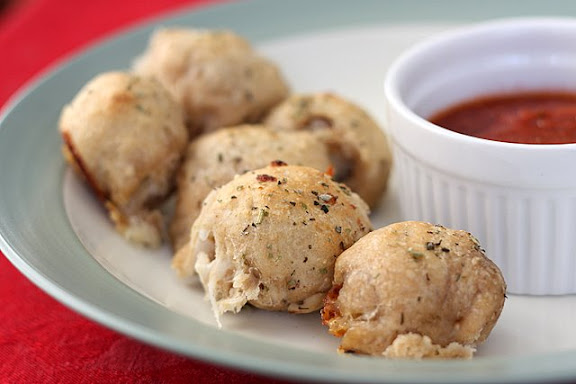
Chicken Parm Pizza Balls

This was a scrumptious dinner inspired by Dish It Up. I used fresh whole-wheat pizza dough, which definitely gave it fabulous flavor, but also made it a bit more difficult to stuff and roll. I think that a tube of dough may be easier to work with, although not as yummy and fresh-tasting. In an effort to add some more protein, I also chopped up some grilled chicken and stuffed into the balls.


These were delicious, and I think they'd make a really fun appetizer. You could stuff this with anything at all, which makes this such a versatile dish.

I do wish that I doubled the recipe. I only got 16 balls to feed all three of us!


Ingredients
  • 1 ball of fresh pizza dough
  • 1-2 cups of shredded mozzarella cheese
  • 1-2 cups of diced chicken
  • 2 tsp Italian seasoning (combine oregano, basil, parsley, and garlic)
  • 1/4 cup olive oil
  • pizza or marinara sauce
Preheat oven to 400°F. Grease pie pan.

Grab a walnut-sized piece of dough and flatten. In each dough piece place a couple pieces of chopped chicken and a tablespoon of cheese. Seal dough around meat and cheese and place seam side down in pie pan.

Repeat, placing approximately 16 dough balls in each pie plate.

Once assembled, drizzle oil over the balls and sprinkle with the herbs.

When ready to bake: bake at 400°F for 16-20 min. Serve with warm pizza or marinara sauce.

(You can also cover with plastic wrap and refrigerate or freeze.)

Wednesday, May 20, 2009

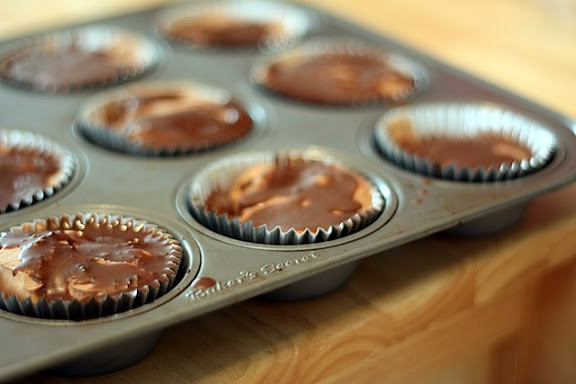
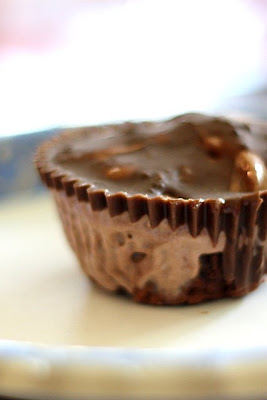
Ice Cream Brownie Cupcakes

This past weekend, Sarah, Colleen, and I went to poor bed-ridden Brooke's house for lunch. Whenever we get together, we all bring a dish so that it's never extra work for the hostess (unless you're me and you suddenly find that you have a clean your house because you haven't cleaned it in about 3 months because your 2-year-old just destroys everything you clean).

I volunteered to bring the dessert, and I could not decide what to bring. Nothing seemed exciting or special enough. Finally, the day before our lunch, I sat down to make my grocery list and forced myself to just make a decision.

To procrastinate, I decided to check out my Google Reader, and lo and behold, fate intervened. The very top post was a recipe for Ice Cream Brownie Cupcakes from Annie. It was different, interesting, and very delicious sounding. Perfect.


I ended up with a few changes; I decided to keep the chocolate them going and used Chocolate Fudge Brownie ice cream instead of strawberry. I also ran out of time to make the ganauche (we were out getting Ryan his big boy bed!) so I had my husband run to the store and grab me a bottle of Magic Shell. Perfect.

Overall, I very much enjoyed the concept of this recipe. The only thing I didn't like was the actual brownie. I was skeptical about it from the beginning, because the batter was very dry and didn't really "spread" in the oven. I also thought it had kind of a weird taste to it... I'm sure it's the fault of the baker and not the recipe! I would for sure try these again.

(Annie later informed me of a typo in the original recipe. It should be 3/4 cups of flour, not 3 cups! No wonder... I fixed it below. Thank you, Annie, for salvaging this yummy dessert for me!)


Ingredients
For the brownies:
  • 3/4 cups all-purpose flour
  • 1 tsp. baking powder
  • 1/2 tsp. salt
  • 8 tbsp. unsalted butter, cut into 8 pieces
  • 3 oz. unsweetened chocolate, coarsely chopped
  • 2 large eggs plus 1 egg yolk
  • 1 1/8 cups sugar
  • 1 tsp. vanilla extract

For the ice cream:

  • 1 batch of chosen ice cream, slightly softened

For the ganache:

  • 3/4 cup mini semisweet chocolate chips
  • 1/4 cup heavy cream

To garnish:

  • Fresh strawberry slices (I omitted)

To make the brownie bottoms, preheat the oven to 350 degrees F. Line two cupcake pans with foil liners. Combine the flour, baking powder and salt in a small bowl; stir together and set aside. In a heatproof bowl set over simmering water combine the butter and chocolate. Heat, stirring occasionally, until melted and smooth. In a large mixing bowl combine the eggs, egg yolk, sugar and vanilla extract. Whisk to blend. Stir in the warm chocolate mixture, and then the dry ingredients, mixing just until incorporated.

Scoop 1 tablespoon of batter into cupcake liner. Bake until a toothpick inserted in the center comes out with moist crumbs attached, 6-8 minutes. Leaving the brownies in the cupcake pans, cool on a wire rack to room temperature. Freeze for at least 30 minutes. Top with strawberry ice cream until the cupcake liner is full. (If the ice cream is freshly made, it is just the right consistency for filling the cupcake liners.) Return the cupcake pans to the freezer for 45 minutes to 1 hour.

To make the ganache, place the chocolate chips in a small bowl. Bring the cream to a simmer in a small saucepan. Pour the cream evenly over the chocolate, let stand for 1 minute. Stir until smooth with a rubber spatula. If the ganache is too thin, allow it to stand at room temperature to cool and become more easily spreadable. Once the ganache is at the correct temperature, scoop it by the teaspoonful on top of the ice cream cupcakes and spread over the tops. Garnish with fresh strawberry slices, if desired.

Remove cupcakes from the freezer 5-10 minutes before serving. Enjoy!

Tuesday, May 19, 2009

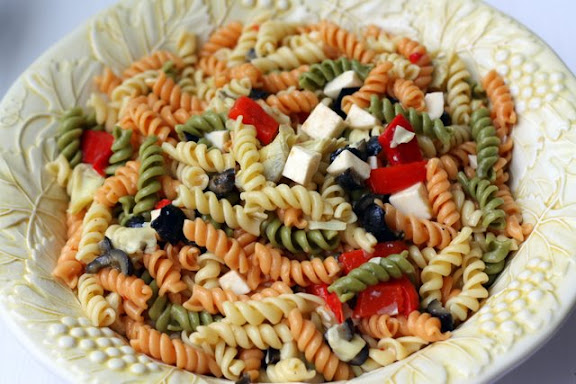
Pasta Salad

Brooke has made this Pasta Salad twice in my presence, and it's too good to not try to make myself!

Pat has a few cousins who live somewhat locally, and we try to get together a few times a year. We went to Jane and Jeff's this past weekend for a barbecue (and for TWO new pregnancy announcements!), and I decided to make Brooke's pasta salad.

I changed around the amounts a tad based on what I had on hand. And there was definitely WAY too much!! I've been taking it to work for lunch all week and throwing some chopped grilled chicken on top.


Ingredients
  • 24 oz uncooked tri-color pasta
  • 1 can sliced black olives
  • 1 jar roasted red peppers, chopped
  • 1 jar artichoke hearts, chopped
  • 1 ball fresh mozzarella, cubed
  • 2 1/2 cups bottled fat-free Italian dressing
Cook pasta according to package directions. Place in bowl and toss with 1 cup dressing. Allow to cool. Toss in all other ingredients and additional 1 cup of dressing. Refrigerate until ready to serve. Just before serving, toss with the final 1/2 cup dressing.

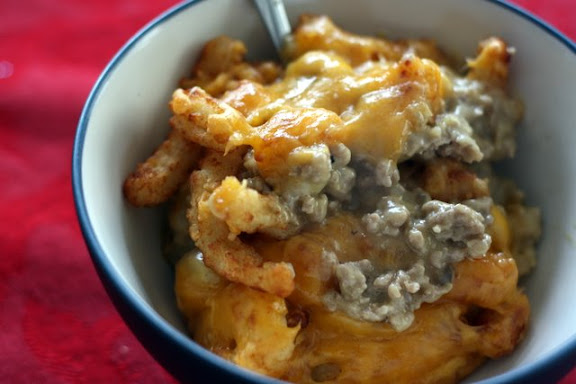
Cheeseburger and Fries Casserole

When Brooke first posted this recipe for a Cheeseburger and Fries Casserole, I was instantly intrigued. Anything that is described as "white trash" has to be good, no?


It was actually even better than I expected! While it's not the classiest dinner I've made, and while I wouldn't use it for company, it was a pretty delicious and easy weeknight meal.


Ingredients
  • 1 pound lean ground beef or turkey
  • salt and pepper to taste
  • garlic powder to taste
  • burger seasoning to taste
  • a few shakes of Worchestire sauce
  • 1/2 (10.75 ounce) can condensed cheddar cheese soup
  • 3/4 (10.75 ounce) can condensed cream of mushroom soup
  • 1/2 (16 ounce) package frozen French fries
  • 1 cup shredded Cheddar cheese

Preheat the oven to 375 degrees F (190 degrees C).

Bake french fries on baking sheet for 10 minutes while preparing beef.

In a skillet over medium-high heat, brown the beef. Cook, stirring occasionally until beef is no longer pink. Drain off excess grease, and add seasonings and Worchestire sauce.

Return to the heat, and stir in the mushroom and cheese soups until well blended. Heat through, and remove from stove. Transfer the mixture to a 8x8 inch baking dish. Cover the ground beef mixture with a layer of partially cooked French fries.

Bake for 25 to 30 minutes in the preheated oven (mine took much less - maybe only 15 minutes?). When the fries are golden brown, remove the casserole from the oven, and sprinkle cheese over the top. Return to the oven, and bake just until cheese has melted.

Monday, May 18, 2009

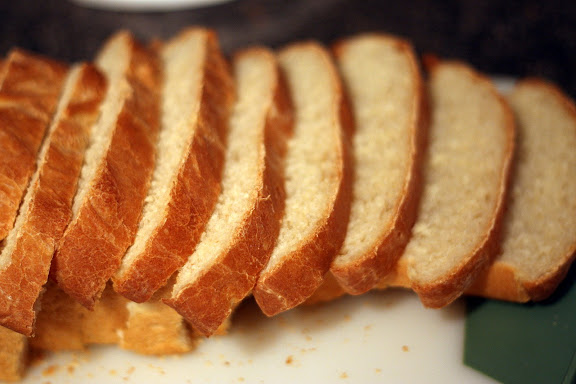
American Sandwich Bread

I am very slowly breaking my way into the yeast world. The hamburger rolls were a relative success, and I decided to try another of Annie's recipes. After work the other day, I headed into the kitchen to make her American Sandwich Bread.


Though there are a lot of steps, this was really easy and didn't require much work for me at all (yay for stand mixers!!). And my house smelled so fantastic while it was baking!

I do think that it wasn't as light and airy as it could have been; perhaps too much mixing? But it was still really good, and I'm pretty damned proud of myself.


Ingredients
  • 3 ¾ cups all-purpose flour
  • 2 tsp. salt
  • 1 cup warm whole milk (about 110°)
  • 1/3 cup warm water (about 110°)
  • 2 tbsp. unsalted butter, melted
  • 3 tbsp. honey
  • 1 envelope (about 2 ¼ tsp.) instant yeast

Adjust an oven rack to the lowest position and heat the oven to 200°. Once the oven temperature reaches 200°, maintain the heat for 10 minutes, then turn off the oven.

Mix 3 ½ cups of the flour and the salt in the bowl of a stand mixer fitted with the dough hook. Mix the milk, water, butter, honey and yeast in a 4-cup liquid measuring cup. Turn the machine to low and slowly add the liquid. When the dough comes together, increase the speed to medium and mix until the dough is smooth and satiny, stopping the machine two or three times to scrape dough from the hook, if necessary, about 10 minutes. (After 5 minutes of kneading, if the dough is still sticking to the sides of the bowl, add flour 1 tablespoon at a time and up to ¼ cup total, until the dough is no longer sticky.) Turn the dough onto a lightly floured work surface; knead to form a smooth, round ball, about 15 seconds.

Place the dough in a very lightly oiled large bowl, rubbing the dough around the bowl to coat lightly. Cover the bowl with plastic wrap and place in the warmed oven until the dough has doubled in size, about 40-50 minutes.

On a floured work surface, gently press the dough into a rectangle 1 inch thick and no longer than 9 inches. With a long side facing you, roll the dough firmly into a cylinder, pressing with your fingers to make sure the dough sticks to itself. Turn the dough seam-side up and pinch it closed. Place the dough seam-side down in a greased 9×5-inch loaf pan and press it gently so it touches all four sides of the pan. Cover with plastic wrap; set aside in a warm spot until the dough almost doubles in size, 20-30 minutes.

Keep one oven rack at the lowest position and place the other at the middle position and heat the oven to 350°. Place an empty baking pan on the bottom rack. Bring two cups of water to boil in a small saucepan. Pour the boiling water into the empty pan on the bottom rack and set the loaf onto the middle rack. Bake until an instant-read thermometer inserted at an angle from the short end just above the pan rim into the center of the loaf reads 195°, 40-50 minutes. Remove the bread from the pan, transfer to a wire rack and cool to room temperature. Slice and serve.

Sunday, May 17, 2009

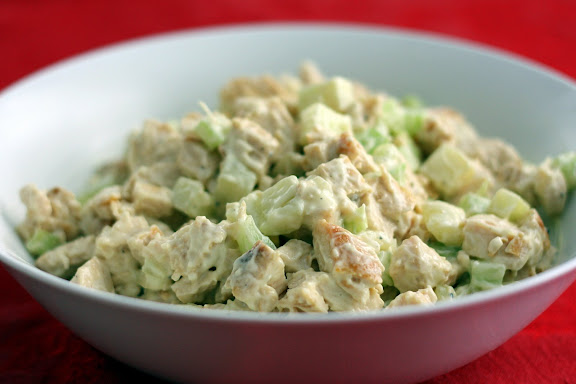
Colleen's Chicken Salad

My taste buds were first introduced to this bowl of yumminess several weeks ago, when Colleen brought this Chicken Salad to my house for a brunch get-together.

I wanted something light and easy to take to work for lunches, and this is perfect. I actually planned to dice up an apple and throw it in there just for kicks, but totally forgot.

This was just so easy to prepare! I threw in a couple of additional chicken breasts onto the grill pan when making dinner, and the rest just came together in minutes. I will definitely be making this again.


Ingredients
  • 2 chicken breasts (about 1 pound), cooked and shredded
  • 1 stalk celery, diced
  • 1/3 to 1/2 of a large cucumber, peeled and diced
  • 1/3 cup mayo, more or less to taste
  • 1 tablespoon Dijon mustard
  • 1 tablespoon lemon juice
  • kosher salt and coarse ground pepper to taste

Combine chicken, celery, and cucumber in large bowl.

In small bowl, combine mayo, mustard, and lemon juice. Pour over chicken mixture, season with salt and pepper; toss gently to coat.

Cover and chill for at least 1 hour, can be made up to 24 hours in advance.

Saturday, May 16, 2009

Lemon Yogurt Cake

I also made Ina Garten's Lemon Yogurt Cake for our Mother's Day post-brunch festivities. It was so nice and light, and the lemon flavor was prominent without being overpowering.

The only "issue" I had with it is that the yogurt seemed to settle at the bottom. The lower inch or so was denser and moister - almost less baked. I'm not sure if that was supposed to happen or not...

But man - it was YUMMY.


Ingredients

  • 1 1/2 cups all-purpose flour
  • 2 teaspoons baking powder
  • 1/2 teaspoon kosher salt
  • 1 cup plain whole-milk yogurt
  • 1 1/3 cups sugar, divided
  • 3 extra-large eggs
  • 2 teaspoons grated lemon zest (2 lemons)
  • 1/2 teaspoon pure vanilla extract
  • 1/2 cup vegetable oil
  • 1/3 cup freshly squeezed lemon juice

For the glaze:

  • 1 cup confectioners' sugar
  • 2 tablespoons freshly squeezed lemon juice

Preheat the oven to 350 degrees F. Grease an 8 1/2 by 4 1/4 by 2 1/2-inch loaf pan. Line the bottom with parchment paper. Grease and flour the pan.

Sift together the flour, baking powder, and salt into 1 bowl. In another bowl, whisk together the yogurt, 1 cup sugar, the eggs, lemon zest, and vanilla. Slowly whisk the dry ingredients into the wet ingredients. With a rubber spatula, fold the vegetable oil into the batter, making sure it's all incorporated. Pour the batter into the prepared pan and bake for about 50 minutes, or until a cake tester placed in the center of the loaf comes out clean.

Meanwhile, cook the 1/3 cup lemon juice and remaining 1/3 cup sugar in a small pan until the sugar dissolves and the mixture is clear. Set aside.

When the cake is done, allow it to cool in the pan for 10 minutes. Carefully place on a baking rack over a sheet pan. While the cake is still warm, pour the lemon-sugar mixture over the cake and allow it to soak in. Cool.

For the glaze, combine the confectioners' sugar and lemon juice and pour over the cake.

Friday, May 15, 2009

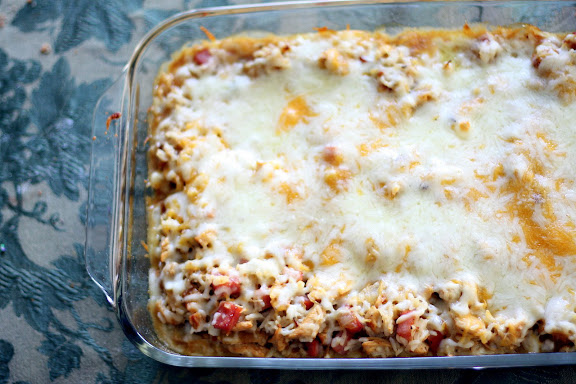
Chicken Cordon Bleu Casserole

I think this is one of the easiest and yummiest meals I've made in a long time. Another success courtesy of Erica's Kitchen Adventures!


This could be an ever faster meal if you used Perdue Shortcuts and those microwaveable envelopes of rice. And I bet it'd be awesome to sub some pasta instead of rice. But honestly, it doesn't matter how you cook it - just cook it. This was just so freaken good.


Ingredients
  • 2 T EVOO
  • 1 medium onion, finely chopped
  • 1 bell pepper, diced (I skipped the pepper, don't like it)
  • 1 clove garlic, minced
  • 1/2 lb diced ham (I just used pre-packaged, pre-diced)
  • 2 c cooks, shredded chicken breast (used 2 fairly large chicken breasts)
  • 4 T butter
  • 1/4 c flour
  • 1/2 t salt
  • 1/4 t pepper
  • 14 oz can chicken broth
  • 3 cups cooked rice (I used brown)
  • 1 c shredded cheddar
  • 1 c shredded mozzarella or swiss (I used a bit of both, and I never measure cheese, I use a lot)

Directions:
Preheat oven to 350.

I precooked the chicken by cutting it into thin strips (to cook faster) and throwing it into a skillet with a bit of oil. Then I shredded from there.

Heat oil in a large, rimmed skillet over medium heat.

Add the onions and peppers and cook for about 5 minutes, until tender.

Then add the garlic, chicken and ham and cook for another 5 minutes until heated through.

Add the butter until it is melted, then stir in the flour, salt and pepper until combined.

Slowly stir in the chicken broth, then mix in the rice.

Transfer mixture to a 9x13 baking dish and sprinkle the top with your cheese.

Bake for 20-25 minutes. For the last 10 minutes place aluminum foil overtop for oozing cheese.

Thursday, May 14, 2009

Summery Soup

I was very intrigued when I read this recipe for a Summery Soup from Little Miss Foodie Two Shoes (a soup that originates from Ellie Krieger).

Even though it's a soup and the weather will eventually get too hot, it really is a good dish for summer. I brought a small bowl for lunch a few times along with half a sandwich - a nice, light but filling meal!


Ingredients
  • 4 cups fresh corn kernels or two 10 oz. packages frozen corn, thawed
  • 2 cups non-fat milk
  • 1 tbs. olive oil
  • 1 large onion, diced (about 2 cups)
  • 1 medium red bell pepper, seeded and diced (about 1 cup)
  • 1 small zucchini (about ½ lb.), diced
  • 2 cups low-sodium chicken or vegetable broth
  • 2 plum tomatoes, seeded and diced
  • ¾ tsp. salt
  • Freshly ground black pepper to taste
  • ½ cup fresh basil leaves, cut into ribbons

Put 2 cups of the corn and the milk into a blender or food processor and process until smooth. Set aside.

Heat the oil in a large soup pot over medium-high heat. Add the onion, bell pepper, and zucchini and cook, stirring, until the vegetables are tender, about 5 minutes. Add the remaining 2 cups corn and the broth and bring to a boil. Add the pureed corn and the tomatoes and cook until warmed through but not boiling. Add the salt and season with pepper. Serve garnished with the basil ribbons.

Yields: 6 servings

Wednesday, May 13, 2009

Good Morning Muffins

As I've posted many times, I love baking muffins with Ryan (or, as he calls them, "nuffins"). I couldn't wait to try these "Good Morning Muffins" from the Pioneer Woman.


I am not sure what, but I did something very wrong. I used liners, and many of them scorched and stuck to the side of the pan. They also got really, really greasy, to the point where I felt gross just picking one up and putting it in a container for Ryan's breakfast.


They tasted good, for sure, but just became too greasy and gross to really enjoy. Any ideas what I can do differently?

(And yes, they look fine - because I took the best-looking ones to photograph. Hee hee!)


Ingredients
  • 4 cups flour
  • 1/2 cup sugar
  • 2 tablespoons baking powder
  • 1/2 cup shortening (can use 1/4 cup shortening with 1/4 cup butter)
  • 2 cups orange marmalade
  • 1 cup orange juice
  • 1 teaspoon vanilla
  • 2 eggs, beaten

Topping:

  • 3/4 cup sugar
  • 1 teaspoon cinnamon
  • 1 teaspoon nutmeg
  • 1 tablespoon plus 1 teaspoon melted butter
  • 1/4 teaspoon salt
  • wheat germ (optional)

Preheat oven to 375 degrees.

Sift together flour, sugar, and baking powder. Place in a mixing bowl.

Use a pastry cutter to mix in shortening (or butter/shortening if desired).

Mix marmalade, orange juice, and vanilla in a small bowl. Pour into dry ingredients.

Beat eggs and pour into the bowl.

Mix all ingredients together gently, using fewer than 10 large strokes.

In a small bowl, mix topping ingredients.

Fill muffin pans with batter. Sprinkle 1 heaping teaspoon of topping ingredients over each muffin.

Sprinkle wheat germ over the top for extra crunch.

Bake for 20 to 22 minutes until done. Remove from pan and cool on wire rack. Eat warm or at room temperature.

Tuesday, May 12, 2009

Mocha Cupcakes

When Annie first posted this recipe for White Chocolate Mocha Cupcakes, I starred it immediately and couldn't wait to make them. Chocolate + Coffee + Cupcakes = goooooood.

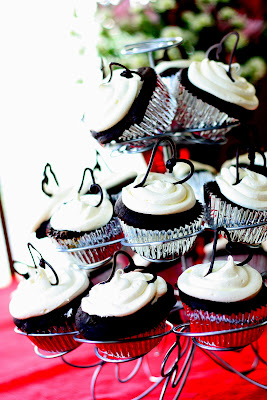
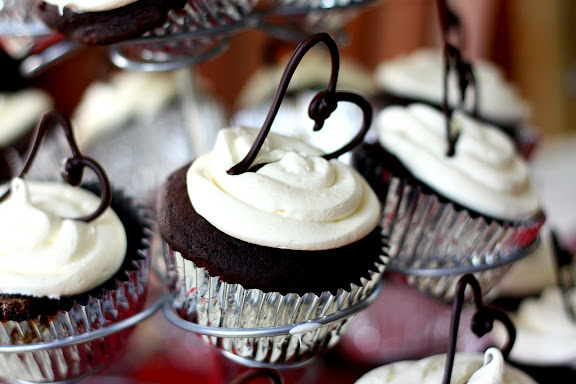
Our families were coming over to our house after brunch on Mother's Day, and I thought these would be a perfect contribution. I even got to whip out the cupcake stand that I haven't used since Ryan's first birthday party!

If you aren't a coffee drinker, fret not - you really can't taste the actual coffee. It just adds a layer of richness to the chocolate and really enhances the flavor.

(I don't know why the top right of this photo is so overexposed... pretend there isn't a chunk of picture missing, 'kay?)

These cupcakes were delicious, and I received many compliments on them - especially on the heart decorations! I don't have piping bags, so I used a sandwich baggie which worked beautifully. I do wish I had made the hole just slightly bigger for thicker outlines, but that's okay.

I also had no success at all with the icing. I'm not sure what I did wrong. The first portion of heavy cream whipped right up, but then that was it. Once I added the white chocolate/cream part, it kind of thickened a little, but no peaks. I kept the white chocolate/cream combo in the fridge, but maybe it wasn't cool enough? That's really all I could think of. So, on our way to brunch, we stopped at the grocery store for some store-bought frosting. Oh well.

So for obvious reasons, I removed the "White Chocolate" part of the title. :)


Ingredients

For the cupcakes:
  • 5 oz. semisweet chocolate, coarsely chopped
  • 2 cups cake flour
  • 1/2 tsp. salt
  • 1/2 cup sour cream
  • 5 tbsp. cocoa powder
  • 2 1/2 tsp. baking soda
  • 4 eggs
  • 2 tsp. vanilla extract
  • 1 1/2 cups hot coffee
  • 12 tbsp. unsalted butter, softened
  • 1 1/4 cup plus 2 tbsp. brown sugar

For the whipped cream:

  • 6 oz. white chocolate, finely chopped
  • 1 1/2 cups cold heavy cream

For decorating:

  • 4 oz. chocolate (I used semisweet), finely chopped
  • chocolate sprinkles

Directions:
To make the cupcakes, preheat the oven to 350 degrees F. Line two cupcake pans with paper liners. In a double boiler, melt the chocolate. Let cool slightly. In a medium bowl, sift together the flour and salt. In another bowl, whisk together the sour cream, cocoa powder and baking soda. Mix to form a paste and then slowly whisk in the coffee. In a small bowl, whisk together the eggs and vanilla.

In the bowl of an electric mixer fitted with the paddle attachment, cream the butter and sugar until fluffy. Slowly add the egg and vanilla mixture and beat until combined. Add the melted chocolate and beat well. Add the flour mixture, alternating with the liquid mixture, beating just until all ingredients are incorporated.

Divide the batter evenly between the cupcake liners. Bake 18-20 minutes, or until a toothpick inserted in the center comes out clean. Allow to cool in the pans 10 minutes, then transfer to a wire rack to cool completely.

To make the white chocolate whipped cream, place the chopped white chocolate in a heatproof bowl set over a pan of simmering water. Melt, stirring occasionally. When the chocolate is almost melted, bring 1/2 cup of the cream to a boil. Once the chocolate is fully melted, transfer the bowl to a counter, pour in the hot cream and let it sit for one minute. Then stir gently with a spatula until the chocolate is smooth. Let the chocolate sit until it reaches room temperature – the chocolate can’t be the least bit warm when it is added to the whipped cream.

In the bowl of a stand mixer fitted with the whisk attachment, beat the remaining 1 cup cream only until it holds the softest peaks. With the mixer on high speed, add the white chocolate all at once and continue to beat just until the mixture holds firm peaks. Transfer the cream to a bowl, press a piece of plastic wrap gently against the surface and refrigerate for at least 2 hours.

While the cream is setting, make the chocolate decorations. Spread a piece of wax paper on a flat work surface. Place the chopped chocolate in a heatproof bowl and microwave in 30 seconds intervals, stirring in between, until completely melted. Allow the chocolate to cool for several minutes (I probably waited 10-15 minutes). Transfer the melted chocolate to a plastic squeeze bottle (a plastic bag with the corner cut off would also work). Carefully squeeze the melted chocolate onto the wax paper in the desired shape. Allow to set completely. Carefully peel off of the wax paper.

Frost the cupcakes with the now set white chocolate whipped cream, top with chocolate sprinkles, and garnish with chocolate decorations. Store in the refrigerator but serve at room temperature for best flavor.

Source: Annie's Eats - cupcakes adapted from Miss Cupcake Face, whipped cream from Baking: From My Home to Yours by Dorie Greenspan

Wednesday, May 6, 2009

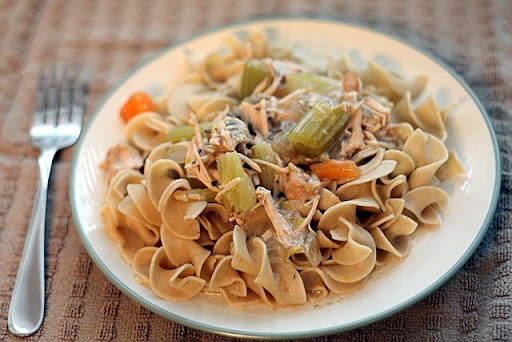
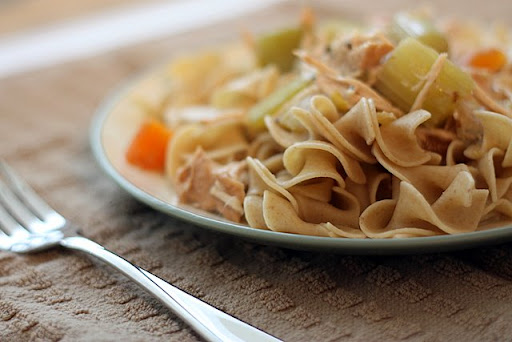
Crockpot Turkey

Whenever someone on my cooking message board updates their food blog, they post what's known as a "BU" - a blog update. This way, others can ogle new dishes and recipes when they are "fresh."


Because I subscribe to about eleventy billion food blogs, I don't always read these BU posts; chances are, I'll see it in my google reader. For some reason, however, I clicked on this one particular post (I don't even remember what it was for!) and saw a blog whose name, Erica's Kitchen Adventures, I didn't recognize. So I added it to my Google Reader and... lo and behold, it was new to me! I immediately went through her list and starred a whole bunch of recipes, including this one for Crockpot Turkey.


Ingredients
  • 2.5-3 lb turkey breast
  • About 32 ou turkey or veggie broth (I used vegetable)
  • 1/2 c white wine
  • About 4 carrots, sliced
  • 4-5 celery stalks, sliced
  • 1 leek, sliced
  • 1/2 onion, sliced into half moons
  • Sage
  • Rosemary
  • Pepper
  • Garlic Powder
  • Flour (optional - I used about 1/2 cup and could have used a little more)
  • Egg noodles

Directions:
Place all ingredients except for the flour and noodles in the crockpot and cook on low for 7-9 hours.

Remove the turkey (leave broth and veggies in the pot) and shred or slice.

If you would like - add some flour to the broth to make a thicker sauce.

Cook your egg noodles according to package directions.

Serve the turkey and sauce over the noodles. Enjoy!! This would probably be great with some good bread!

Tuesday, May 5, 2009

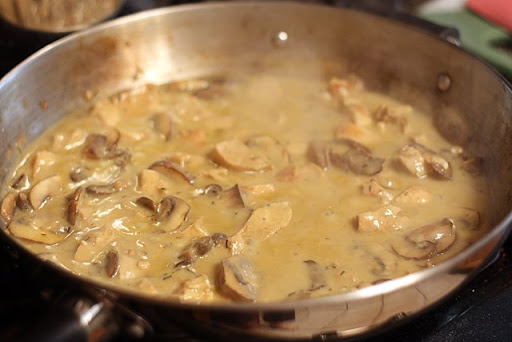
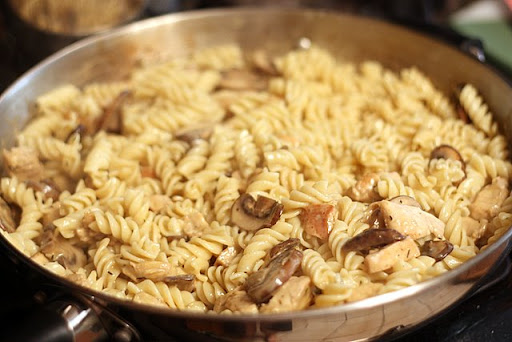
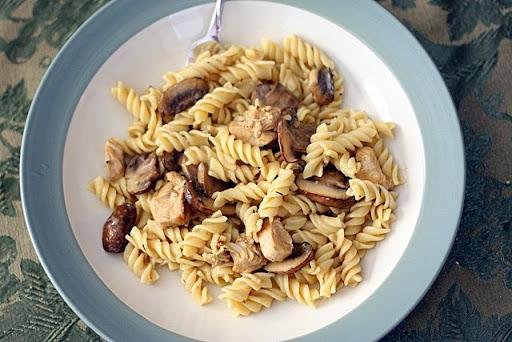
Creamy Fusilli with Mushrooms and Chicken

I used to check the daily line-up on the Food Network site every.single.day. Any recipe that looked good that was being prepared on TV that day immediately went into my "recipe box." I had a very healthy collection of dishes saved and used them frequently in my menu planning.

Then... *insert scary music here* they changed their website layout. Oh, the horror! It was not nearly as user-friendly as it once was, and my daily visits definitely dwindled and ultimately ceased completely.


A few weeks ago, however, I was watching a show on the FN and went to search for the recipe. In doing so, I found this tasty Creamy Fusilli with Mushrooms and Chicken from Robin Miller and couldn't wait to make it.


It was super easy to prepare and very delicious. The only thing I would change would be to double (or at least increase) the amount of sauce. It was okay when fresh, but my leftovers were definitely a bit on the dry side.


Ingredients

  • 1 pound fusilli
  • 2 teaspoons olive oil
  • 12 ounces sliced mushrooms (any variety)
  • Cooked chicken fingers (about 12 strips), cut into 1-inch pieces
  • 1 teaspoon dried thyme
  • 1/4 cup sherry
  • 1 cup reduced-sodium chicken broth
  • 2 tablespoons all-purpose flour
  • 1/2 cup milk
  • 1 cup grated Havarti cheese
  • 1/3 cup sliced black olives

Cook fusilli according to package directions.

Meanwhile, heat oil in a large skillet over medium-high heat. Add mushrooms and saute 3 to 5 minutes, until mushrooms soften. Add chicken and thyme and cook 1 minute. Add sherry and cook 1 minute. Add chicken broth and bring to a simmer. Whisk together flour and milk and add to chicken mixture. Simmer 2 to 3 minutes, until sauce thickens.

Remove from heat, add cheese and stir until cheese melts. Add fusilli and toss to combine. Fold in black olives. Serve green beans on the side.

Saturday, May 2, 2009

1960's Craptastically Good and Ridiculously Easy-to-Make Beef Casserole

Before I had even joined one of my message boards, there had been a recipe collection and distribution. One of the women was gracious enough to send me the document, and I sat for hours, happy as a clam, going through them.


This one, submitted by a woman named Pat, totally caught my eye and I couldn't wait to make it. Besides, you read the name - just the title radiates with goodness!

The meal absolutely lived up to its name, and I was kind of bummed that my husband took the leftovers. Hee hee! This will for sure be a repeat here.


Ingredients
  • 1 lb. ground beef
  • 1 medium onion (diced)
  • 1 can Campbell’s tomato soup (undiluted)
  • 1 can green beans (drained) (I used about a cup or so of frozen mixed veggies)
  • Mashed potatoes
  • ½ cup shredded cheddar cheese

Brown the beef and onion. Drain. Add the tomato soup and the green beans and stir. Transfer to a three quart baking dish. Top with the mashed potatoes and cheese. Bake at 350 degrees until bubbly (30 minutes).

Friday, May 1, 2009

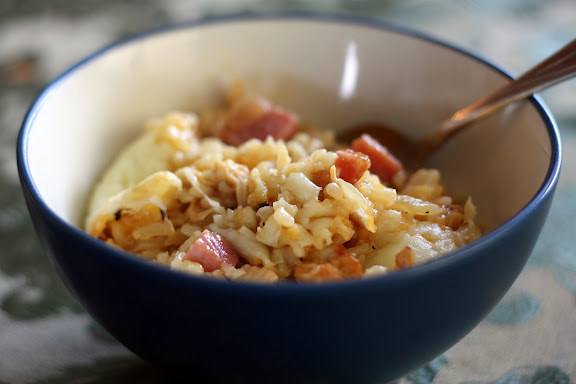
Broken Spaghetti Risotto

Back in November, Brooke and I and a few of her friends went to New York City to see a taping of the Rachael Ray show. One of the recipes that Rach cooked up was this Broken Spaghetti Risotto.

I've been waiting months to get around to making this, but I gotta say - I was very disappointed. Sure, it tasted good and all, but I found it was not as yummy as a regular risotto OR regular spaghetti/meatballs. In fact, I think the leftovers are still in my fridge and probably should be tossed by now...

I did alter the original recipe, so click the link above if you want her version.


Ingredients
  • 1 package baby bella mushrooms, sliced
  • 1 quart chicken stock
  • 2 cups water
  • 3 tablespoons extra virgin olive oil (EVOO), plus a drizzle
  • 1 medium onion, finely chopped
  • 2 large cloves garlic, grated or finely chopped
  • Salt and freshly ground black pepper
  • 1 pound spaghetti, broken into small pieces
  • 1/2 cup dry white wine
  • 2 tablespoons butter
  • 3/4 cup Parmigiano Reggiano, (a few handfuls)
  • 1 cup (more or less depending on preference) frozen peas

Place stock and water in a sauce pot and heat; keep warm on low. Take the peas out of the freezer so they can start to thaw.

Heat a medium sauté pan or risotto pan with 3 tablespoons EVOO, 3 turns of the pan, over medium to medium-high heat. Add mushrooms, onions and garlic to pan, season with salt and pepper, to taste, and sauté until tender 4-5 minutes. Add pasta and toast until deeply golden in color and very nutty in fragrance, 6-7 minutes. Stir in wine and let it cook away, 1 minute. Ladle in stock every few minutes, stirring for a good minute with each addition of stock to develop starches. Evaporate almost all of the liquid before each addition of stock. Pasta will cook up quicker then rice. Start tasting after about 8-9 minutes of cooking time once you begin to add stock.

When pasta is cooked to al dente, stir butter into the pan then stir in the cheese and peas.

Related Posts with Thumbnails