Thursday, December 1, 2011

Skinny Artichoke Dip

I think that Skinny Taste is one of my go-to blogs, especially for an appetizer.  I'm looking to cut out calories wherever I can, and she does just that without sacrificing flavor or appearance.

This is another dish that I prepared for Thanksgiving, but it's definitely not fall-specific.  I doubled it for our crowd and it was perfect.  This would be great during a football game or holiday dinner party.  I polished off the leftovers for lunch!


Skinny Artichoke Dip
from Skinnytaste

  • 13.75 oz artichoke hearts packed in water, drained
  • 2 tbsp chopped shallots
  • 1/4 cup fat free Greek yogurt
  • 1/4 cup light mayonnaise
  • 1/3 cup Parmigiano Reggiano
  • 1/2 cup (2 oz) shredded part skim mozzarella cheese
  • salt and fresh pepper to taste
  • 2 tbsp whole wheat bread crumbs
  • olive oil spray
Preheat oven to 400°.

In a small food processor, coarsely chop the artichoke hearts with the shallots.

Combine artichokes, yogurt, mayonnaise, parmesan cheese, mozzarella, salt and pepper in a medium bowl. Place in an oven-proof dish and top with breadcrumbs. Lightly spray the crumbs with olive oil then bake at 400° for 20-25 minutes, until hot and cheese is melted. Serve right away.

Can be made one day in advance without the breadcrumbs and stored in the refrigerator before baking. Add breadcrumbs before baking. Makes about 2 1/2 cups.

Tuesday, November 29, 2011

Cranberry Pomegranate Holiday Sangria

As soon as I saw this vibrant sangria on Pinterest, I pinned it right to my Thanksgiving board where I stashed a bunch of recipes I planned to use this year.  Normally I'd wait until next year to post something Thanksgiving-related, but I think this would fit in quite nicely on your December holiday menu as well.

When I went to the liquor store to get the wine for this, I picked up an "Apple Cider" wine.  It tasted a bit too sweet for me on its own, but in this sangria it was perfect.  There was not a drop left by the end of the meal!

Cranberry Pomegranate Holiday Sangria
from Deep South Dish

  • 1 (750 ml) bottle of red zinfandel
  • 4 cups of cranberry juice
  • 2 cups of POM Wonderful pomegranate juice
  • 1 cup of orange juice
  • 3/4 cup of simple syrup
  • 1 apple, unpeeled, cored, quartered & sliced thin
  • 1 orange, halved and sliced thin
  • 1 lemon, halved and sliced thin
  • 1/2 cup of fresh cranberries
  • 1/4 cup of pomegranate seeds
  • San Pellegrino sparkling water
Combine all of the ingredients in an extra large storage container, taste and adjust flavors to your liking. Chill at least 4 hours or overnight. Stir before serving and transfer to pitchers or pour by the glass. Use a pair of tongs to extract some of the fruit for each glass, add ice to each glass, and fill glasses, leaving about an inch of free space at the top. Top each glass off with a splash of Pellegrino and lightly stir.

Note from the source: The color for this sangria comes primarily from the juices, so you can use either red or white. Use any good wine that you prefer. I used a red zinfandel, but other good choices include Cabernet Sauvignon, Merlot, Rioja, Shiraz, or Beaujolais.

Friday, November 11, 2011

Cranberry Pomegranate Sauce

Hey, blogging world!  I have been way too absent lately and I'm hoping to change that soon.  Work is crazy, my kids are busy, and we're entering "the holidays" which, as awesome as they are, makes my to-do list grow exponentially.  I keep saying I just need to find my groove, but... well, I'm still waiting...

This is a recipe that I made for the first time last Thanksgiving and I've been waiting since then to post it.  I've always just done cranberry sauce from a can, and you have to admit that it's pretty good.  However, I've always wanted to try a fresh version, so I was happy to see that The Pioneer Woman posted a recipe that looked unique, easy, and delicious.

This was just sweet enough without being overpowering.  I loved the healthy addition of pomegranate sauce, and I especially loved the fact that I could make it in the morning and let it chill all day.  Any recipe that can be done in advance scores some serious bonus points from me!

We host a crowd of 20+, so I doubled the recipe below.  You can bet that it will be back on my table this year!


Cranberry Pomegranate Sauce
from The Pioneer Woman

  • 1 bag (about 12 To 16 Oz) Fresh Cranberries
  • 16 ounces, fluid Pomegranate Juice
  • 3/4 cups Sugar, More Or Less To Taste
Combine all ingredients in a medium saucepan and cook over medium-low heat for 20 minutes, stirring occasionally to prevent burning. Mixture will thicken as it cooks, and will thicken more as it cools.
Cool in a jar or bowl in the fridge. Serve with Thanksgiving turkey.

Thursday, August 18, 2011

Asian Chicken Pizza

I've really been enjoying making pizza for my family every Friday night. I might even be ready to *gasp* try making my own dough!

When deciding on take-out, my husband usually chooses pizza while I tend to gravitate towards Chinese. This collaboration, however, satisfies us both. Oh, the deliciousness; another keeper from Stephanie Cooks!


Asian Chicken Pizza
  • Pizza dough
  • 5 ounces of chicken, chopped into small pieces
  • 1/2 tsp. red pepper flakes (less or more depending on how hot you want it)
  • 3 cloves garlic, minced
  • 1/4 cup low-sodium soy sauce
  • 2 1/2 tbsp. honey
  • 3/4 cup rice wine vinegar OR apple cider vinegar
  • 1 cup mozzarella cheese
  • Olive oil
  • Sesame seeds (optional)
  • 2 tbsp. sliced green onion
Preheat the oven to 450.

Combine the red pepper flakes, garlic, soy sauce, honey, and vinegar. Stir well, set aside.

In a small skillet cook the chicken. Remove from the pan and set aside.

Pour the sauce mixture into the pan. Heat over medium heat until it thickens and becomes syrup like, about 10 minutes. Add the chicken, toss well.

Form the dough. Top with a drizzle of olive oil, rubbing to coat the dough.

Top with the chicken/glaze mixture. Make sure it's evenly coating the dough.

Top with the cheese and sprinkle with sesame seeds if using.

Bake 10-12 minutes. Top with green onion. Serve hot.

Tuesday, August 16, 2011

Crunch Bar Pie

This is crazy overdue! I participated in a recipe exchange months ago... I made the recipe right away but didn't get around to blogging it... and then totally forgot. Picture me hanging my head in shame.


Now picture me with a big dorky grin on my face, because that's pretty much what I looked like when I made this awesome pie. I took some shortcuts and made some changes (this was originally based on Andes mints) but the results were unbelievable. There's still plenty of summertime left, and this would be perfect for a barbecue.


Crunch Bar Pie
adapted from Laurie's Kitchen
  • 1 prepared chocolate pie crust
  • 2 cups whipping cream, divided
  • 10oz mini Nestle Crunch bars
  • 1/2 cup milk
  • 3 1/2 cups mini marshmallows
  • 1 tablespoon sugar
Over low heat, use a double boiler to bring 1/4 cup cream to a simmer. Turn off the heat.

Add about half of the Crunch bars (reserve a couple of tablespoons for garnish) and stir until melted and smooth.

Leave a tablespoon or two aside and spread the sauce along the bottom of the pie crust and place in freezer.

Over low heat, use a double boiler to melt the marshmallows in milk, stirring constantly. Add the other half of the Crunch bars (remember to keep aside the garnish!) and stir until melted and smooth. Refrigerate until COLD.

Once the marshmallow mixture is cold, beat 1 1/4 cups whipping cream until stiff; fold into the cold marshmallow mixture.

Spoon into pie crust and drizzle with reserved chocolate sauce (you may need to reheat it in the microwave to soften).

Refrigerate until chilled.

Before serving, whip remaining 1/2 cup cream and sugar; pipe or spoon over filling. Sprinkle with reserved chopped Crunch bars.

Friday, July 1, 2011

"Chicken" Bacon Ranch Pizza

It's Pizza Friday! This is another awesome pizza from Stephanie Cooks. There should be chicken in here too, but yours truly forgot to defrost the chicken in time. The accidental omission didn't matter, however; the pizza did just fine without it (though I can't wait to try it again with the chicken). We ate this outside on the patio and my husband repeatedly requested that I make two of these next time.


Chicken Bacon Ranch Pizza
from Stephanie Cooks; originally from Annie's Eats
  • 1 batch of pizza dough
  • Olive oil
  • 1/4 cup ranch salad dressing
  • 4 ounces grilled chicken, diced small
  • 3 slices of bacon, cooked crisp and diced small
  • 1 tomato, seeded and diced small
  • 2-3 green onions, chopped
  • 3/4 cup shredded cheddar cheese
  • 1/4 cup shredded mozzarella cheese
Preheat the oven to 450.

Prepare your pizza dough, leaving a thicker edge around the side for the crust. Prepare it on either parchment paper or on a pizza peel topped with corn meal. Drizzle olive oil lightly over the crust and rub it all over the dough, over the edges as well. Bake for 7 minutes.

Top with the ranch salad dressing, spreading evenly over the crust.

Next, arrange your chicken, bacon, and tomato evenly over the dressing.

Top with the cheddar cheese. The sprinkle the mozzarella evenly over top.

Transfer the pizza to the stone. Bake 10-12 minutes or until the cheese is melted and the crust is golden.

Top with the green onions as soon as you pull it from the oven. Serve hot.

Thursday, June 30, 2011

Roasted Asian Veggies

I'm really not a huge side-dish-during-the-week kinda person. If my main dish doesn't already have a veggie in it, I'll throw a frozen bag into the microwave and call my meal balanced.

Now that I'm on summer break, however, I'm trying to be better about serving fresh vegetables and this one from weelicious is just perfection. It takes barely any effort, and as long as you have the time it takes to roast in the oven, you're good to go.

I would never ever have thought to infuse broccoli and cauliflower with Asian flowers, but I'm glad somebody did. This was awesome, and my kids inhaled it. I combined the leftovers with some couscous and grilled chicken for a perfect lunch.


Roasted Asian Veggies
from Weelicious
  • 2 Cups Broccoli Florets
  • 2 Cups Cauliflower Florets
  • 2 Tbsp Low Sodium Soy Sauce
  • 1 Tbsp Toasted Sesame Oil
  • 1 Tbsp Toasted Sesame Seeds

Preheat oven to 400°F.

Place florets on a greased baking sheet, top with soy sauce and sesame oil, and toss to coat evenly.

Bake for 30 minutes until golden, then sprinkle with sesame seeds.

Serve.

Wednesday, June 29, 2011

Summer Cookout Veggie Burger

I'm for sure no vegetarian (I could never live without chicken or turkey!) but I try to eat vegetarian several times a week. In the past, though, "eating vegetarian" meant pasta. Delicious, yes, but not exactly protein-packed or very healthy.

So you can imagine, of course, that I was happy to come across Leslie Sarna's Veggie Burger. I've always been intrigued by this concept; a burger? Made without MEAT?! Really? But why not, right?

These were SO easy to make, and I was able to throw some into the freezer for quick lunches and dinners. I gave my husband and kids their burgers on a regular bun, but I put mine on a deli flat and then put it on the panini press. Perfection.


Summer Cookout Veggie Burgers

from Leslie Sarna
  • 1 can of black beans, drained and rinsed
  • 1 can of white kidney beans, drained and rinsed
  • 1 cup rolled oats (non-instant Oatmeal)
  • 3/4 cup bread crumbs (I like to use Panko also called Japanese bread crumbs if you can find them)
  • 1 tsp. (or more) chili powder
  • 1 tsp. paprika
  • salt and pepper to taste
  • about 3 tbsp. chopped chives
  • 1 egg
  • olive oil
  • 1 small red bell pepper, finely diced
  • 1/2 onion, finely diced
  • 4 oz. mushrooms, finely diced
  • 6 sun dried tomatoes, diced
  • 3 cloves of garlic, minced

In a medium frying pan, heat some olive oil. Add the chopped onion, garlic, bell peppers and a pinch of Salt. Let cook 2 minutes on a lower heat. Add mushrooms and sun dried tomatoes; let cook another couple minutes. Let cool when cooked. While the veggies are cooling, in a large bowl combine the Beans, Oats, Bread Crumbs and all the spices and chives. Toss a little and add the egg. Using your hands to mix the mixture until it's slightly sticky and about 3/4 of the beans are smashed. Add in the veggies. Continue to work with your hands. If the mix feels a little dry, add water by the teaspoon until right. If it's too wet, add bread crumbs : ) Form 8 burger patties. Refrigerate for about an hour. (you can also place these pouches in a ziploc bag and freeze for up to a couple of weeks) To cook, unwrap the burgers from the plastic and cook in a heated skillet with cooking spray or olive oil in the bottom. Cook about 3-4 minutes on each side.

PS these should always be cooked on a skillet or frying pan. Unfortunately, they can fall apart if cooked on the bbq.

Tuesday, June 28, 2011

Pioneer Woman's Perfect Pancakes

I've mentioned many times that my husband is the pancake expert in our house. I can never ever get them to come out right and usually end up frustrated, but when he requested pancakes for his Father's Day breakfast, I knew I had to suck it up and do it.

So I did.

I added some chocolate chips and food coloring, and I really think the cake flour made a huge difference. As usual, the Pioneer Woman didn't disappoint, and we happily enjoyed some special pancakes!

(Sidenote: my youngest is currently obsessed with Eric Carle's Pancakes, Pancakes! and kept yelling his toddler version of "Let's make a pancake!" and laughing hysterically at himself.)


Perfect Pancakes
from The Pioneer Woman
  • 3 cups Plus 2 Tablespoons Cake Flour
  • ½ teaspoons Salt
  • 3 Tablespoons Baking Powder
  • 2 Tablespoons Sugar
  • 2 cups Milk
  • 2 whole Large Eggs
  • 3 teaspoons Vanilla
  • 4 Tablespoons Butter
  • Extra Butter
  • Maple Or Pancake Syrup

Mix together dry ingredients in large bowl.

Mix together milk, eggs, and vanilla in a separate bowl.

Add wet ingredients to dry ingredients, stirring very gently until just combined.

Melt butter and add it to the batter, stirring gently to combine.

Cook on a greased skillet over medium-low heat until golden brown. Serve with an obscene amount of butter and warm syrup.

Monday, June 27, 2011

Tomato Alfredo Pizza

I mentioned a few days ago that I've been making pizza every Friday. As I prepare my menu for the week, I go directly to Stephanie Cooks. Here, my friend Stephanie has an incredible pizza variety and I have bookmarked nearly all of them. Do yourself a huge favor and go check out her pizza collection.

This honestly tasted like a gourmet pizza. My husband and I inhaled the whole thing and, I must confess, I would have eaten more had there been any.

(Disregard the photo - I snapped some pics but then ended up baking it again for another minute or two and forgot to take new pictures.)


Tomato Alfredo Pizza
from Stephanie Cooks
  • Pizza crust
  • 1/2 tbsp. butter
  • 1/2 tbsp. flour
  • 3/4 cup skim milk (or cream if you don't want to take the light approach)
  • 1/4 cup pecorino romano cheese
  • 3/4 cup mozzarella cheese
  • 1/4 cup tomato sauce (I used sliced tomatoes instead)
Preheat the oven to 450. Stretch out the pizza dough on your stone or pan and bake for 7 minutes.

In a small saucepan melt the butter. Add the flour, stirring until it forms a paste.

Pour in the milk, stirring constantly.

Bring to a low boil then reduce the heat to a simmer. Once the sauce is somewhat thick, add the romano cheese, stirring well.

Cover the pizza crust with the alfredo sauce and add sliced tomatoes if using.

Top with the mozzarella cheese. Drizzle the tomato sauce over the cheese.

Bake 10-12 minutes, until the cheese is melted and the crust is crisp.

Sunday, June 26, 2011

Pesto Chicken Thighs with Italian Cream Sauce

I have been trying very hard to significantly cut back on the amount of processed foods I serve my family. However, when Philadelphia introduced their new line of cooking cremes, I admit I was intrigued. This curiosity only increased when I saw this recipe on Picky Palate.

My sauce didn't really come out like hers, but this was still a delicious dinner (and the leftovers for lunch were just fab). The flavors just exude summertime, and this meal was filling and satisfying without being heavy.


Pesto Chicken Thighs with Italian Cream Sauce
from Picky Palate
  • 1 pound boneless chicken thighs, fat removed
  • 1/2 cup prepared pesto sauce
  • 2 cups cooked couscous
  • 4 tablespoons extra virgin olive oil
  • 1/2 cup freshly shredded Parmesan cheese
  • 1 cup Philadelphia Italian Cheese and Herb Cooking Creme

Place chicken thighs and pesto into a large ziplock bag, seal and refrigerate for at least 1 hour.

Preheat oven to 350 degrees F. Place chicken thighs onto a large baking sheet that has been sprayed with non-stick cooking spray. Bake for 25 to 35 minutes, until chicken is cooked through.

Place cooked couscous, olive oil and parmesan cheese into a medium saucepan over medium-low heat, stirring to combine. Cook until heated through, about 5 minutes. Reduce to heat to low.

Warm Philadelphia Italian Cheese and Herb Cooking Creme into a small saucepan over medium-low heat until warmed. Reduce heat to low.

To serve, place couscous onto a serving plate and top with chicken. Drizzle with warm cooking cream.

Makes 4 servings

Saturday, June 25, 2011

Taffy Apple Salad

I have had this recipe for years... well before my oldest son was born. I make it multiple times each summer for barbeques and parties; I have NO idea why I've never blogged about it before.

I omit the nuts because my father and son are both allergic, but I think they'd be a wonderful addition. Even without, though, it's a refreshing and delicious side dish. The marshmallows somehow melt away to meld with the rest of the ingredients and the fruit combinations are endless. I've subbed fresh pears for some of the apples or canned for the pineapples. Mandarin oranges would work nicely as well - mix it up!


Taffy Apple Salad
from The Pampered Chef
  • 1 8oz can pineapple tidbits in juice
  • 2 medium red apples, cored and diced
  • 2 medium Granny Smith apples, cored and diced
  • 1/2 cup dry roasted peanuts, coarsely chopped
  • 4oz cream cheese, softened
  • 1 cup thawed, frozen whipped topping
  • 1 cup miniature marshmallows
  • additional chopped dry roasted peanuts (optional)
Drain pineapple, reserving juice. Whisk cream cheese into juice until smooth. Stir in whipped topping; mix until blended.

Add pineapple, apples, peanuts, and marshmallows to cream cheese mixture; mix gently. Cover and refrigerate until ready to serve. Sprinkle with additional peanuts if desired.

Friday, June 24, 2011

Crockpot Chicken Stroganoff - Revisited

A few months ago, I participated in a really fun blogging event - the March Madness of crockpot cooking, hosted on 365 Days of Slow Cooking. One of my assignments was to make Chicken Stroganoff, and I loved it - but I really wanted to try to find a lighter version.

So, with some help from some ladies on an online forum, I adjusted this a bit to include a little less guilt without losing the flavor. Then, instead of egg noodles, I served it over some Israili couscous. Yum!


  • 2-3 tablespoons butter
  • 3 tablespoons all-purpose flour
  • 1/2 cup low sodium chicken broth
  • 1/2 cup low-fat or fat free milk
  • 1 1/2 lbs boneless, skinless chicken thighs
  • 1/4 cup chopped onion
  • 8oz sliced mushrooms
  • 1 (8 oz) can tomato sauce
  • 1/2 cup plain lowfat Greek yogurt
  • 2 tsp dried parsley
  • salt and pepper to taste
In a small saucepan, melt the butter and add the flour. Stir constantly until the flour is incorporated and the mixture is bubbly and thick. Add the milk and broth and stir until thoroughly combined, heated, and thick.

Combine the chicken, onion, mushrooms, broth mixture, and tomato sauce in slow cooker. Cover and cook on LOW for 5-6 hours or on HIGH for 3 hours. Shred the chicken and add in the parsley, yogurt, and and season with salt and pepper. Stir and turn to HIGH. Let sit without lid for 10-15 minutes. Serve over couscous.

Thursday, June 23, 2011

Red Velvet Brownies

I loooove red velvet. And I looooove brownies. Put them together and you have a delicious marriage of something simply delectable and wonderful.

I made these soon after I spotted them on my friend Lisa's blog and, while I am usually a boxed-brownie kind of girl, these are worth every extra step.


Red Velvet Brownies
from Lisa's Cooking Adventures; originally from Pink Parsley
  • 4 oz bittersweet chocolate, chopped
  • 3/4 cup (1 1/2 sticks) butter
  • 2 cups sugar
  • 4 large eggs
  • 1 1/2 cups all-purpose flour
  • 1 (1-oz) bottle red food coloring
  • 1 1/2 tsp baking powder
  • 1/8 tsp salt
  • 1 tsp vanilla extract
  • 1/4 cup buttermilk
  • 1 tsp white vinegar
Cream Cheese Swirl
  • 4 oz cream cheese, at room temperature
  • 2 Tbs sugar
  • 2 Tbs sour cream
  • 1/4 tsp vanilla extract
  • 1/2 large egg yolk
Preheat the oven to 350 degrees. Line a 9x9 inch square baking dish with two pieces of aluminum foil, folding ends over the edges. Spray with cooking spray.

Combine the chocolate and butter in a large, microwave safe bowl. Cook 30 seconds at a time until melted, stirring well after each time. Whisk in the sugar. One at a time, add the eggs, whisking well between each addition. Stir in the flour, food coloring, baking powder, salt, buttermilk, vanilla, and vinegar. Combine well, then pour into the prepared baking dish.

In the bowl of a stand mixer fitted with a paddle attachment, beat the cream cheese, sugar, vanilla, and egg yolk. Drop spoonfuls over the brownie batter, then use a table knife to swirl into the batter.

Bake 40-50 minutes, or until a toothpick inserted into the center comes out with just a few crumbs attached. Allow to cool completely before slicing.

Wednesday, June 22, 2011

Hot Fudge Marshmallow Monkey Bread

Oh my. This breakfast is not for the faint of heart. Or for those who are just ambivalent when it comes to sweetness. This was absolutely delicious, and my family loved it. This would be awesome to serve for guests - as long as you have some fruit and protein to balance it all out. ;)


Hot Fudge Marshmallow Monkey Bread
from Taste and Tell

  • 1 tablespoon butter, softened
  • 1 can (16.3 oz) Pillsbury Grands Homestyle refrigerated buttermilk biscuits (8 biscuits)
  • 1 can (10.2 oz) Pillsbury Grands Homestyle refrigerated buttermilk biscuits (5 biscuits)
  • 13 large marshmallows
  • 1/2 cup butter
  • 1/2 cup hot fudge ice cream topping
  • 1 teaspoon vanilla extract
  • 1 cup sugar
  • 1 tablespoon cocoa

Heat oven to 350°F. Grease 12-cup fluted tube cake pan with 1 tablespoon butter. Cut all 13 biscuits into quarters; set aside.

In large microwavable bowl, place marshmallows, 1/2 cup butter, hot fudge topping and vanilla. Microwave uncovered on High 1 to 2 minutes, stirring once, until melted. Using wire whisk, stir until smooth.

In medium bowl, stir sugar and cocoa until blended.

Carefully place 1/4 of the biscuit pieces into hot chocolate mixture, gently folding in to coat. Add another 1/4 of the biscuits, gently folding in to coat. Using tongs, remove biscuits from chocolate, letting excess chocolate drip off. Drop 1 biscuit piece at a time into sugar mixture; spoon sugar over biscuit to coat. Layer biscuits in cake pan. Repeat with remaining biscuits. Sprinkle any remaining sugar mixture over biscuits.

Bake 30 to 40 minutes or until biscuits are deep golden and no longer doughy in center. Cool in pan 5 minutes. Place heatproof serving plate upside down over pan; carefully turn plate and pan over. Remove pan; immediately scrape any remaining topping in pan onto bread. Pull apart warm bread to serve.

BBQ Chicken and Pineapple Pizza

I'm baaaaaaaaaaaaaack!

Oh how I've missed my blog! The end of the school year is always chaotic as I try to write my final exams, clean out my classroom, and read portfolio evaluations. Throw my own two young children into the mix and most days I'm happy just to eat, let alone prepare a blog post.

But! Yesterday, I said goodbye to my 97 favorite 9th graders (well, the ones who showed up) and today I am ready to blow the dust off of this blog.

I've been making my own pizza on Fridays (I have many more to come!) and I am loving the tradition. I recently purchased a round stone from Pampered Chef and it has changed my life. My dough comes out so much better now, and I'm actually planning to buy a second (and maybe a third!) so that I can do double duty. My husband and I love trying new variety, but the kids keep asking me for "regular" pizza.

Anyway. This BBQ Chicken and Pineapple Pizza has been a favorite for sure. What a delicious flavor combo! It's so perfect for this time of year, and it's so easy to put together (especially if you cheat like I did and use canned pineapple).


BBQ Chicken and Pineapple Pizza
slightly adapted from Sing for Your Supper
  • 1 batch pizza dough
  • 1 cup grated mozzarella cheese
  • 1/2 cup grated cheddar cheese
  • 2 chicken breasts, fully cooked and shredded
  • 1/2 cup BBQ sauce, plus more for brushing on the crust
  • 1/4 cup ranch salad dressing
  • 1 can crushed pineapple or pineapple tidbits
  • fresh cilantro, chopped, about 1/3 cup (I omitted)

Preheat the oven to 400 degrees. Stretch dough across pizza stone or tray and bake for 7 minutes.

Toss the cooked, shredded chicken breasts with the BBQ sauce. Set aside.

Brush the pizza crust with a thin layer of BBQ sauce, then spread on the ranch dressing. Top with the cheddar cheese and mozzarella cheese, then the chicken and pineapple. Bake for about 15 minutes, until all the cheese is melted and the crust is golden brown. Top with the chopped cilantro. Makes 1 pizza.

Wednesday, May 11, 2011

Cheesy Stuffed Tomatoes

It's grilling season! I'm not as huge of a fan as most people are, but I definitely enjoy using it this time of year when it's not really hot out yet. So I was pretty excited to learn that "grilling" was the theme for my most recent recipe exchange.

My friend Melanie submitted these awesome Cheesy Stuffed Tomatoes, and I all but inhaled them. I added couscous to the mixture to give it an extra boost, and I'm glad I did. I ate two of them for dinner, and only let my husband eat one so I could take the other one for lunch the next day. Sorry, babe.


Cheesy Stuffed Tomatoes
slightly adapted from The Novice Chef
  • 4 medium tomatoes
  • 1/4 cup of your favorite breadcrumbs
  • 1 cup cooked couscous
  • 2 tbl butter, melted
  • 8 basil leaves, chopped
  • 1/2 cup monterey jack cheese, shredded (plus more for sprinkling)
  • 1/2 teaspoon salt
  • 1/2 teaspoon pepper
  • Parsley for garnish
Slice off top of tomato, hollow out (leaving 1/2 inch thick shell), and chop pulp and set aside. In a medium bowl, combine bread crumbs, couscous, butter, basil, salt and pepper. Next stir in cheese and tomato pulp. Fill each tomato shell, top with extra cheese, and then wrap each tomato individually in foil.

Grill, or bake (at 400 degreeProxy-Connection: keep-alive
Cache-Control: max-age=0

29 for 10 to 15 minutes, until cheese is completely melted. Garnish with parsley and serve hot!

Saturday, April 30, 2011

Funfetti Waffles

I'm fairly certain I have adequately stated my affinity for anything funfetti. I've made cake, cupcakes, ice cream, cookies... as far as I'm concerned, anything with sprinkles is automatically awesome.

I never would have thought, however, to bring the fun (ha) to my breakfast table, but Chef Mommy sure did. This was a great excuse to bust out the dinosaur sprinkles from Danny's birthday party; I think it would be so much fun to use holiday themed sprinkles throughout the year!

The whole family loved these - Ryan was so excited to be eating sprinkles at breakfast time!

In case you couldn't tell, this is an elephant from my awesome circus waffle iron!

Posted by Picasa

Funfetti Waffles
from Chef Mommy
  • 2 cups all-purpose flour
  • 1 teaspoon salt
  • 4 teaspoons baking powder
  • 2 tablespoons white sugar
  • 2 eggs
  • 1 1/2 cups warm milk
  • 1/3 cup butter, melted
  • 1 teaspoon vanilla extract
  • 1/4 cup sprinkles
In a large bowl, mix together flour, salt, baking powder and sugar; set aside. Preheat waffle iron to desired temperature.

In a separate bowl, beat the eggs. Stir in the milk, butter and vanilla. Pour the milk mixture into the flour mixture; beat until blended.

Ladle the batter into a preheated waffle iron. Add the sprinkles on top. Cook the waffles until golden and crisp. Serve with whipped cream and additional sprinkles on top.

Friday, April 29, 2011

Overnight French Toast

I love making fun breakfasts for my families on holidays, but I also don't want to spend my mornings in the kitchen when there are stockings to dig into or eggs to find. This Overnight French Toast was just perfect; I threw it together the night before Easter and then put it in the oven in the morning. By the time the last egg had been uncovered, breakfast was ready!

I can't even begin to articulate how amazing this is. I think it's going to become a permanent brunch staple for me. I was afraid it would be too soggy or sticky, but that's not an issue at all. The texture is mushy, but not in a bad way - in a delightful way!

Posted by Picasa

Overnight French Toast
from Bite This!; adapted from Pillsbury
  • 2/3 cup firmly packed brown sugar
  • 1/2 cup maple-flavored syrup
  • 1 tablespoon margarine or butter
  • 10 (1-inch-thick) slices Challah bread
  • 4 eggs
  • 1 1/2 cups skim milk
  • 1 teaspoon vanilla
  • 1 teaspoon cinnamondash of nutmeg
  • 1/8 teaspoon salt
  • 1 to 2 tablespoons powdered sugar1
  • 1/4 cups sliced strawberries (optional)
Spray 13x9-inch pan with nonstick cooking spray. In medium saucepan, combine brown sugar, syrup and margarine. Bring to a boil over medium heat, stirring constantly. Boil 1 minute.

Pour syrup mixture evenly in bottom of sprayed pan. Arrange bread slices in even layer over syrup mixture. Set aside.

In large bowl, combine eggs, milk, vanilla and salt; beat with wire whisk until smooth. Pour evenly over bread in pan. Cover; refrigerate at least 8 hours or overnight.

To bake, heat oven to 350°F. Uncover pan; bake 30 to 35 minutes or until lightly browned.

To serve, top each serving with 1/4 cup sliced strawberries; sprinkle with powdered sugar.

Thursday, April 28, 2011

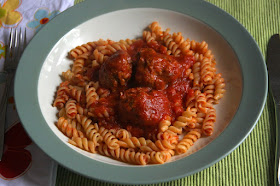
Chicken and Bacon Ranch Mac and Cheese

You already know that I'm a huge mac and cheese fan. Look over there to the left - I have a whole tag full of variations, and though I definitely have my favorites, I'm always up for trying something new.

This Chicken and Bacon Ranch Mac and Cheese was adapted from Cooking Light, but I'm not really sure what's so light about it. Sure, it could be a lot worse, but this doesn't really scream healthy dinner to me.

Anyway, fat content aside, this was a seriously delicious dinner that both of my children gobbled up. I doubled it, which left plenty for leftover lunches for a couple of days. I also took Danielle's suggestion and added broccoli.

Posted by Picasa

Chicken and Bacon Ranch Mac and Cheese
adapted from Dinner with Danielle, who adapted from Cooking Light
  • 8 ounces uncooked Fusilli pasta
  • 3 slices pre-cooked bacon, cut into small pieces (reserve 1/3)
  • 8 ounces skinless, boneless chicken breast, cut into 1/2-inch pieces (about 1 breast)
  • 1 tablespoon butter
  • 1 tablespoon all-purpose flour
  • 12 ounces skim milk
  • 1 can condensed 98% fat-free cream of mushroom soup
  • 4oz shredded cheese
  • 3 teaspoons Ranch dressing mix
  • 1 steamer bag of broccoli florets, cooked
  • Cooking spray
Preheat oven to 350.

Cook pasta according to package directions, omitting salt and fat; drain.

Cook chicken in a large nonstick skillet over medium heat. Add bacon to the pan and warm through. Remove from heat and set aside.

Melt butter in a large saucepan over medium heat; sprinkle flour evenly into pan. Cook 2 minutes, stirring constantly with a whisk. Combine milk and soup, stirring with a whisk; gradually add milk mixture to saucepan, stirring with a whisk. Bring to a boil; cook 2 minutes or until thick. Remove from heat; let stand 4 minutes or until sauce cools to 155°. Add cheeses and dressing mix, stirring until cheese melts. Stir in broccoli, pasta and chicken.

Spoon mixture into an 8-inch square baking dish coated with cooking spray. Bake covered for 10-15 minutes; remove cover and bake for another 10.

Wednesday, April 27, 2011

Pesto Meatballs

I really wish I had photographed these BEFORE putting on the sauce so you can see the amazing color of these Pesto Meatballs from The Food Network Magazine.

I usually bake my meatballs and am not used to frying - I had a few casualties. But the flavor of these meatballs is so intense and powerful that it's worth it. I used store-bought pesto but can only imagine the punch of homemade. What a great summery twist to a go-to comfort meal!

Posted by Picasa

Pesto Meatballs
from The Food Network Magazine, by way of Carrie's Sweet Life
  • 2 pounds ground meat
  • 1 cup breadcrumbs
  • 1 cup pesto
  • 1/2 cup milk
  • 1/2 cup grated Parmesan

Form into small balls. Cook in a nonstick skillet with olive oil, 10 to 12 minutes.


Tuesday, April 26, 2011

Perfect Party Cookies

I love Funfetti. I also love cookies. So combine those two loves, and what do you get?

These fantastically awesomely Perfect Party Cookies from Stephanie Cooks.

I can't wait to make them again. They really ARE perfect! I used some sprinkles I had leftover from Valentine's Day, but I really wish I had thought to use the kids' dinosaur sprinkles (no worries - I used those in another funfetti recipe - coming soon!). I also used actual funfetti cake mix because I happened to have it.

Posted by Picasa

Perfect Party Cookies
from Stephanie Cooks
  • 1 cup flour
  • 1 cup yellow boxed cake mix
  • 1/4 tsp. baking soda
  • 3/4 cup butter, melted, and slightly cooled
  • 1 egg
  • 1 egg yolk
  • 2 tsp. vanilla
  • 1/2 cup sugar
  • 1/2 cup brown sugar
  • 1 cup chocolate chips
  • 4 tbsp. colored sprinkles
In a large bowl sift together the flour, cake mix, and baking soda. Set aside.

In a bowl, beat together the melted butter, egg yolk, egg, and vanilla until slightly creamy. Add the sugars and stir well.

Add the flour mixture, stir until well combined.

Stir in the chocolate chips and sprinkles.

Refrigerate for 30 minutes (the dough will be very runny).

Preheat oven to 350.

Once dough is chilled, scoop heaping tablespoons worth of dough onto greased cookie sheets. The dough should be slightly smaller than a golf ball. Keep dough cool until it goes in the oven.

Bake 12-15 minutes, until the edges are golden and the center sets.

Cool for 5 minutes on the sheet, then place on a cooling rack to cool.

Saturday, April 23, 2011

Red Velvet Cake

I'm not a baker.  I'd like to be, but I'm not.  I've learned pretty early on in this blogging adventure of mine that boxed mixes exist for people like me.  And that's okay.

Every once in awhile, though, I get the urge to bake from scratch.  I decide that I can totally do it, and any idiot who can read can bake.

It usually ends in regret.

Last weekend, my whole family gathered at Nana's for our annual Palm Sunday dinner and egg hunt.  I was really excited to make something and remembered that I saw an awesome looking Red Velvet Cake on my friend Lisa's blog.

I didn't have too much of an issue making it, but upon eating it, it tasted really dry.  I was disappointed, but then remembered the likely culprit.  I used egg substitute, and I had the liquid equivalent of just over 1 egg, not 2.  I intended to go back and add a little extra buttermilk to balance it out, but... of course, I forgot.

The flavor, however, was really good, and the icing?  Oh.my.god.  Beyond amazing.  The dryness was a bummer, but you couldn't even tell when you topped it with a scoop of ice cream. 

I would definitely try this again - this time, with TWO eggs.


Red Velvet Cake

  • 2 1/2 cups (250 grams) sifted cake flour
  • 1/2 teaspoon salt
  • tablespoons (15 grams) regular or Dutch-processed cocoa powder
  • 1/2 cup (113 grams) unsalted butter, at room temperature
  • 1 1/2 cups (300 grams) granulated white sugar
  • large eggs
  • 1 teaspoon pure vanilla extract
  • 1 cup (240 ml) buttermilk
  • 2 tablespoons liquid red food coloring
  • 1 teaspoon white distilled vinegar
  • 1 teaspoon baking soda

Cream Cheese Frosting:

  • 1 - 8 ounce (227 grams) cream cheese, room temperature
  • 1 - 8 ounce (227 grams) tub of Mascarpone cheese, room temperature
  • 1 teaspoon pure vanilla extract
  • 1 cup (115 grams) confectioners' (icing or powdered) sugar, sifted
  • 1 1/2 (360 ml) cups cold heavy whipping cream (contains 36-40% butterfat)

Preheat oven to 350 degrees F (175 degrees C) and place rack in center of oven. Butter two - 9 inch (23 cm) round cake pans and line the bottoms of the pans with parchment paper. Set aside.

Red Velvet Cake: In a mixing bowl sift together the flour, salt, and cocoa powder. Set aside. In bowl of your electric mixer, or with a hand mixer, beat the butter until soft (about 1-2 minutes). Add the sugar and beat until light and fluffy (about 2-3 minutes). Add the eggs, one at a time, beating well after each addition. Scrape down the sides of the bowl.Add the vanilla extract and beat until combined.

In a measuring cup whisk the buttermilk with the red food coloring. With the mixer on low speed, alternately add the flour mixture and buttermilk to the butter mixture, in three additions, beginning and ending with the flour.In a small cup combine the vinegar and baking soda. Allow the mixture to fizz and then quickly fold into the cake batter. Working quickly, divide the batter evenly between the two prepared pans and smooth the tops with an offset spatula or the back of a spoon. Bake in the preheated oven for approximately 25 - 30 minutes, or until a toothpick inserted in the center of the cakes comes out clean.

Cool the cakes in their pans on a wire rack for 10 minutes. Place a wire rack on top of the cake pan and invert, lifting off the pan. Once the cakes have completely cooled, wrap in plastic and place the cake layers in the refrigerator for at least an hour (or overnight). (This is done to make filling and frosting the cakes easier.)

Cream Cheese Frosting: In the bowl of your electric mixer, or with a hand mixer, beat the cream cheese and mascarpone cheese until smooth. Add the vanilla and confectioners sugar and beat until smooth. Using the whisk attachment, gradually add the heavy cream and whip until the frosting is thick enough to spread. Add more sugar or cream as needed to get the right consistency.

Assemble: With a serrated knife, cut each cake layer in half, horizontally. You will now have four cake layers. Place one of the cake layers, top of the cake facing down, onto your serving platter. Spread the cake layer with a layer of frosting.  Place another layer of cake on top of the frosting and continue to frost and stack the cake layers. Frost the top and sides of the cake. Can garnish the cake with sweetened or unsweetened coconut. Serves 10-12 people.

Friday, April 22, 2011

Carrot Apple Coconut Mini Muffins

My friend Brooke often talks about Weelicious and makes their recipes for her toddlers.  I finally remembered to add it to my Google Reader, and immediately I starred a bunch of stuff.

I made these Carrot Apple Coconut Muffins a few days ago, and my entire family devoured them.  They were so easy to throw together and were absolutely delicious.  I'm normally not a fan of coconut, but it goes so well with the carrot and apple that you can't help but love them.  They definitely didn't last long in my house!

I didn't intend to make any changes, but my grocery store only had sweetened coconut, not unsweetened - but I kind of liked the sweetness they added!


Carrot Apple Coconut Mini Muffins

  • 1 1/2 Cups All Purpose Flour
  • 1 Tsp Baking Powder
  • 1/2 Tsp Baking Soda
  • 1/2 Tsp Salt
  • 1/2 Cup Unsweetened Coconut Flakes
  • 2 Carrots, peeled & grated, about 1 cup
  • 1 Apple, peeled & grated, about 1/2 cup (gala, fuji, pink lady or red delicious are good choices)
  • 2 Large Eggs
  • 1 Tsp Vanilla Extract
  • 1/3 Cup Milk
  • 1/4 Cup Vegetable or Canola Oil
  • 1/2 Cup Honey

Preheat oven to 350 degrees.

Combine the first 7 ingredients in a bowl.

In a separate bowl, combine the remaining ingredients.

Slowly add the dry ingredients into the wet and stir to combine.

Place 1 tbsp of batter into greased mini muffin tins.

Bake for 15 minutes.

Serve.